Cargo Trailer Conversion
Cargo Trailer Conversion

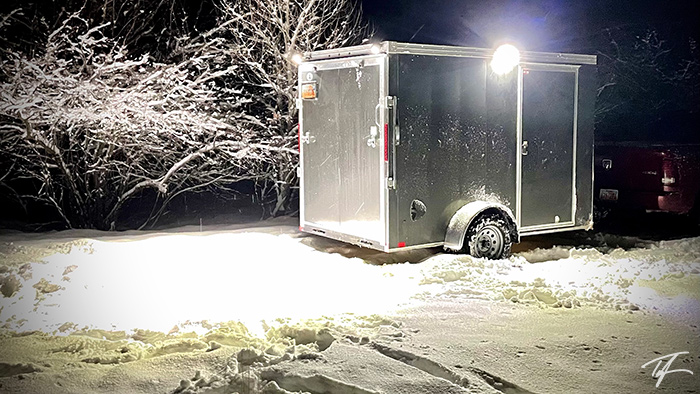
6x10 Haulmark Transport Cargo Trailer
Note: The trailer was sold in September 2021 and this article will no longer be updated.
In June 2020, I purchased a 6x10 cargo trailer to haul camping gear and kayaks. It wasn't originally going to be a cargo trailer conversion to be used for sleeping in.
Design
In August, I was brainstorming how a cargo trailer conversion could be made into a nice camping trailer while still maintaining the ability to still use it as a cargo trailer. A design was envisioned that would have a galley permanently installed in the nose of the trailer. There would also be a removable bench placed along the driver-side wall of the trailer and against the left face of the galley. E track on both sides of the trailer would hold a removable bed.
One requirement was that the cargo trailer conversion should not feel like a cargo trailer when in camping mode. So, it is being finished out with shiplap walls, a board and batten ceiling, and durable LVP flooring. Curtains will hang on the ramp end of the bed to hide the ramp door and spring. LED puck lights provide all interior lighting. 12V auxiliary plugs are strategically placed in all four corners of the trailer; specifically to allow USB charging and reading lights when in bed.
When the trailer is needed to haul cargo, it will take about ten minutes to remove the bed, bench, and whatever camping gear was left under the bed. The E track will allow me to strap heavy objects down. The interior space provides a full 6-foot high, 6-foot wide, and about 9-foot deep space for cargo.
In mid-September 2020 the project began and is being converted as budget allows. When not attached to my truck, the trailer is secured by both a Proven Locks coupler lock as well as a PacLock coupler lock. The PacLock coupler lock is also used when attached to my truck.

Insulation
Insulation in the walls, ceiling, and floor was first.
- 1" Owens Corning Formular R6 insulation was used in the walls and ceiling.
- 1/2" Johns-Mansville R2.7 polyiso insulation was used in the floor.
- Reflectix was installed between the other insulation—stapled to the back of all sheeting on the walls, ceiling, and floor.

Cargo Trailer Conversion Electrical System
The 12V DC electrical wiring runs along channels created in the new subfloor on the perimeter of the cargo trailer conversion. Some of the wiring is run along the upper corners where the walls meet the ceiling.
There are eight circuits in the DC system.
- Interior and porch lights
- Loading ramp lights
- MaxxAir vent fan
- Water pump and diesel heater
- Back left 12V outlet
- Back right 12V outlet
- Bench 12V outlet
- Front cabinet 12V outlets
There are six lighted push button switches in the trailer.
- Right of RV door
- Four ceiling lights above the bed area
- Porch light
- Left of RV door
- Two ceiling lights in the front galley area
- Two lights under the lower floating shelf above the galley counter
- Centered above ramp door
- Two 3" flood lights above the loading ramp area
- Centered on cabinet fascia panel
- Water pump cut off

For a short time, the switches next to the RV door were installed in a stainless steel household wall plate. However, it felt like too much for a small trailer. And, the overall design is meant to be as minimalist as possible. So, they ended up being mounted right in the shiplap panel that was strategically pin nailed so future access to the wiring is possible.

A 120V AC port plug was installed on the underside of the trailer and enters the floor of the electrical cabinet. A power strip is installed at the top of the front wall of the cabinet. I will eventually replace the power strip with a 30A 120V circuit breaker box.
10 AWG cable was pre-wired from a rooftop gland installed at the nose of the trailer down to the base of the sink cabinet and then into the electrical cabinet for future solar panels.

The fuse block and negative bus bar are mounted on the nose wall of the cabinet. All wiring from the loads to the fuse block/bus bar is 12 AWG.

The first phase of the slide-out electrical panel is done and is on the right wall of the cabinet. The second phase will add the solar charging system when finances allow. It is designed to be easily disconnected and pulled out of the electrical cabinet for servicing and reconfiguration if necessary. See the electrical cabinet plan.
An unused tool battery charger was modified to output 12V DC using a 24V to 12V converter and a 12V outlet. The DC system can now be powered with a single tool battery. This will be a temporary solution until a deep cycle battery can be purchased. It will also be a backup option when needed.
A diesel heater will be installed on the original trailer floor under the sink cabinet. A three-inch cold air intake vent will be installed in the toe kick of the right cabinet while the hot air outtake will vent in the far left side of the sink cabinet's toe kick. A 120V outlet and 2-inch desk grommet is installed in the left cabinet's toe kick. The desk grommet is a pass-through for electrical devices in the bench for the water pump, a 12V outlet, and 120V outlets. The water supply line also feeds through the grommet. The 12V outlet in the bench is intended for a future compressor chest fridge. All items in the bench can be easily disconnected.
Galley Cabinets and Shelves

The galley cabinets are built using 1/2 inch maple plywood on the back and 3/4 inch maple plywood for the walls, base, and doors. A four-inch fascia panel is installed across the top of the cabinets and has two 12V outlets, two 120V power strips with three outlets each, and the on/off cutoff switch for the water pump in the center. The left upper cabinet has two single burner stoves and butane fuel. The left lower cabinet is where the electrical system is housed. Both center and right cabinets will have concealed drawers hidden behind their respective doors. The cabinets have a fairly minimalist design. A diesel heater will be installed on the trailer's original floor under the center cabinets with venting in the toe kick.
Floating Shelves

18" above the galley cabinets and countertop are floating shelves. The lower shelf is 8" deep while the upper shelf is 10" deep. The two shelves are both 2" thick and spaced 8" apart. The substructure is a frame of 1x2 and 2x2 material assembled with pocket holes and grabber screws. The finish materials are 1/4" maple plywood on the top and bottom of each shelf and 1/2" poplar boards cut to 2 1/8" on the face. The top and face materials were pin nailed to the substructure while the bottom face material for the lower shelf was screwed to the substructure to allow access to repair the lighting if needed. All items for the galley shelves will travel in a tote on the floor. When it's time to set up camp, it will only take a few minutes to place them on the shelves where they belong.
Wood Finishes
The shelves were stained with Rust-Oleum's Kona wood stain and then sealed with Minwax's Polycrylic clear satin protective finish. The base cabinet doors and faces will also receive the Kona stain while all interior materials will be left in their natural color and sealed with the same Polycrilic finish.
The countertop will be butcher block sealed with mineral oil.
Bench
Secured to the wall using an E track anchor, the bench is 40 inches long, and 16.5" deep and tall with a full-length piano hinged lid and a two-inch upholstered foam cushion sitting on top. Inside the bench is most of the freshwater storage, the water pump, and limited space for 12V and 120V outlets. The outlets are accessible on the left side of the bench. The bench is easily removable by two bolts.
Cargo Trailer Conversion Water System
The water system consists of three 5.3 gallon (20 liters) collapsible water bags inside the bench. A fourth water bag is carried in a milk crate in the "garage" under the bed. This provides a total capacity of just over 21 gallons (80 liters) of freshwater.

One-at-a-time, they are attached to the waterline which has an in-line on-demand 1.2 GPM (4.5 LPM) water pump. The water line has quick disconnect fittings that allow easy removal of the bench when needing to switch to cargo mode. The single lever faucet has a 0.5 GPM (1.9 LPM) aerator installed. The sink will drain into the six-gallon (23 liters) upright "gray water" jug secured to the front center wall of the sink cabinet.
With a water flow of 0.5 GPM, it takes about 10.5 minutes to empty each 5.3-gallon water bag (the water pump is able to run dry). Since the "gray water" tank has more capacity than the freshwater bags, it will not be able to overflow before being emptied when switching to a full water bag. The gray water tank will be empty anytime the trailer is moved.

Only environmentally friendly biodegradable soaps will be used and 99% of food particles will never be put down the drain, so the gray water can be disposed of most anywhere. When possible, I prefer to pour it slowly into the base of a burning fire pit to remove the scent and prevent attracting animals.
A fifth water bag can be filled with "untreated" water and filtered using gravity to fill an empty freshwater bag. Water won't be the limiting factor of how long camping is possible as long as a water source such as a river, stream, or lake is nearby.
A full test of the cargo trailer conversion water system was recently done. It worked flawlessly. A probe with several holes along it was created and gets inserted into the water bag making sure it can suck the bag dry without collapsing to the point it's unable to completely empty it. After the first test, the bag had less than a teaspoon of water left in it. As expected, the pump and water line has the typical pulsing and vibration that is common with water pumps.
Walls and Ceiling
The E track is in place with two sticks of 8-foot track on the driver's side wall, and two sticks of 5-foot track on the passenger's side wall. The two rows are mounted two inches from the floor and 31 inches from the floor. This will allow the ability to secure loads to the walls when using the trailer for cargo and have a platform for the bed when camping.
The walls are being finished with 5mm plywood over the existing OSB in a 7 3/8" high shiplap design. They are being painted Benjamin Moore's Revere Pewter. The ceiling is 1/4 inch maple plywood done in a board and batten design to hide the screws holding the ceiling up. All trim and the ceiling is being painted white.

Craftsman style crown moldings may seem odd to have in a cargo trailer conversion. But it serves as a run for the ceiling lights wiring before heading down to the switches next to the RV door.
The exact amount of crown needed was purchased for the project. But, since I'm new to this, and the trailer has strange corners, I have to admit I had to go back to the hardware store twice to get two additional 8-foot sticks of molding because I couldn't get the angles right. It was so frustrating! But, it looks so good now that I'm getting the finish materials in place.
Cargo Trailer Conversion Flooring

I was able to purchase three open-box packages of Claremount Oak luxury vinyl plank (LVP) flooring from Lowe's for 50% off. When installing it that night, I discovered that one of the boxes was a different product and didn't quite fit together easily with the other two boxes. It's not that it was a different size, it's that it was a slightly different tongue-and-groove and so it was harder to put together. It's a lighter-colored plank but still works well with the other two overall... especially for the price. I still need about three or four pieces, so I'll either have to purchase another box at full price or wait and take a chance that I can get another at a discount. It's probably one of the nicest floorings done in a cargo trailer conversion.
Cargo Trailer Conversion Bed
Since the trailer is a 6x10, there isn't enough width to have the bed sideways like a 7x or larger would in this cargo trailer conversion. The interior width is 69 inches. Since a queen mattress is 60x80, it was thought that it might be possible to put one in. But, since every inch matters, the 80-inch depth was too much. A full-size mattress would be the next best option—but, they are only 54x75. Much too narrow for the 69 inches. Next, it was decided to go with two tri-fold cot (small single) size mattresses that are 31x75 each. This would take up 62x75—getting better. But, then an epiphany!!! What about a cot size mattress (31x75) and a twin size mattress (38x75)... DING! DING! DING! There is 69 inches exactly—the length of a full bed, and more than halfway between the widths of a queen and king bed.
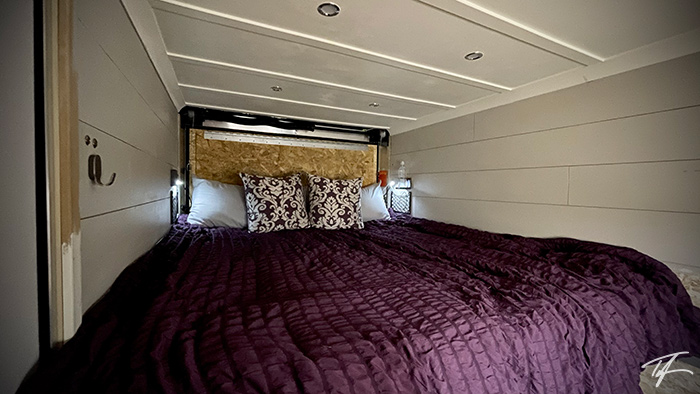
Tri-fold mattresses were also preferable so the platforms (two side-by-side) can be built in two pieces 50 and 24 inches deep connected with a piano hinge. This allows the ability to fold up the mattresses when not being used and fold back 1/3 of the bed to give an additional 25 inches of space inside the trailer. One platform is the width of the cot mattress, and the other is the width of the twin mattress. Both bed platforms are removable and sit atop four 2x4s held by the E track. The bed platform sits higher than was preferred, but there's room to sit upright without hitting your head, and the bench allows easy access to get up.
The available storage in the garage underneath is plentiful for anything that will be brought along. The garage height worked perfectly as the camp chairs fit without a half-inch to spare. Most items that travel in the garage are set up at campsites so that space will be nearly empty at night and what remains could be put in the bed of the truck if space is needed for one or two people to sleep on the floor of the garage area.

What's left "punch list"
In likely order (with some camping sprinkled throughout)...
- Galley
- Purchase and install butcher block countertop—IKEA is out of stock
- Install sink permanently
- Build and install drawer for center cabinet
- Finish install and paint of shiplap and trim—waiting for countertop to be installed
- Purchase and install windows and shades
- Purchase and install diesel heater
- Electrical system
- Purchase and install smart shunt
- Purchase and install battery
- Phase Two of the electrical system (purchase and install)
- MPPT solar charge controller
- Solar panels
- Associated fuses and wiring


")